How to Draw a Cute Tree Frog
This step by step tutorial shows how to draw a frog from the side view with easy to follow line drawing illustrations as examples.
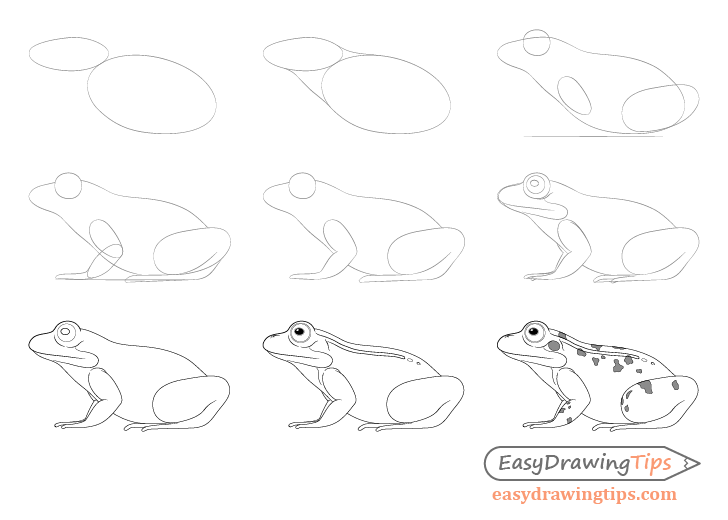
This is a fairly simple tutorial great for beginners. Be sure to draw light lines for the initial steps if drawing using pencil and paper. You can also erase some of the guide lines as you move from one step to the next to avoid confusion.
For some general basic drawing tips you can also see:
Beginner Guide to Learning to Draw
Step 1 – Draw the Basic Shape of the Frogs Head & Body

For the side view of this type of frog start the drawing with oval shapes. One for the head and one for the body.
The goal of these is to establish the proportions of the frog and to define some of it's basic shapes.
Step 2 – Draw the Neck Area
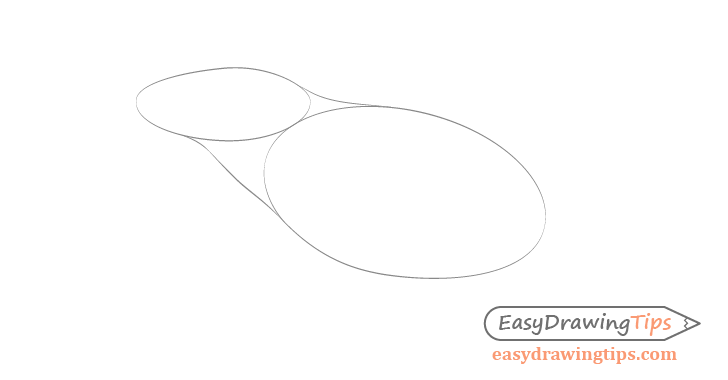
Connect the two ovals for the frogs neck area. The neck will curve outwards at the bottom and inwards at the top so draw accordingly.
Step 3 – Start Drawing the Body Parts
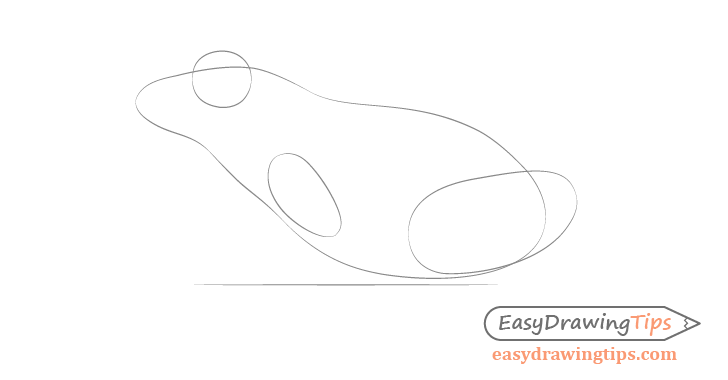
Now draw the simplified shapes of some of the other major parts of the frog's body. Add the eye area and the upper portions of the front and back legs as shown in the example.
Also draw a horizontal line to help you place the bottom portions of the legs in the next step.
Step 4 – Draw the Bottom Leg Parts and the Feet
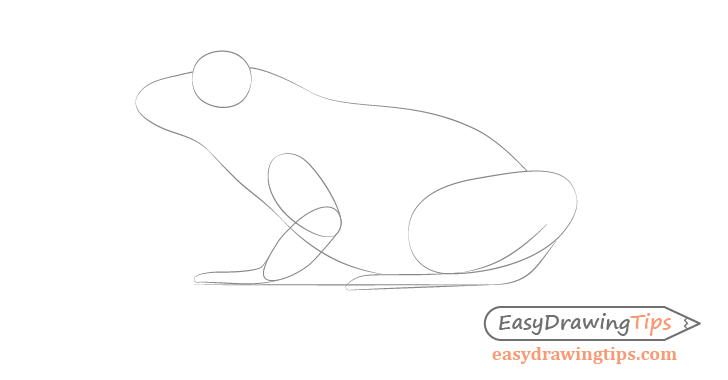
Add the bottom portions of the legs and the basic shapes of the feet.
The back feet can go slightly below the horizontal line from previous step.
Step 5 – Clean Up the Light Line Drawing
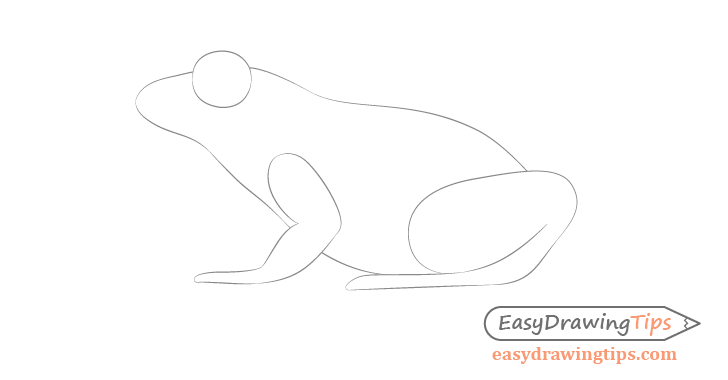
At this stage it's good to erase all of the guide lines and make sure that you have a nice and clean light line drawing of the frog before moving on to the next step.
Step 6 – Add the Details
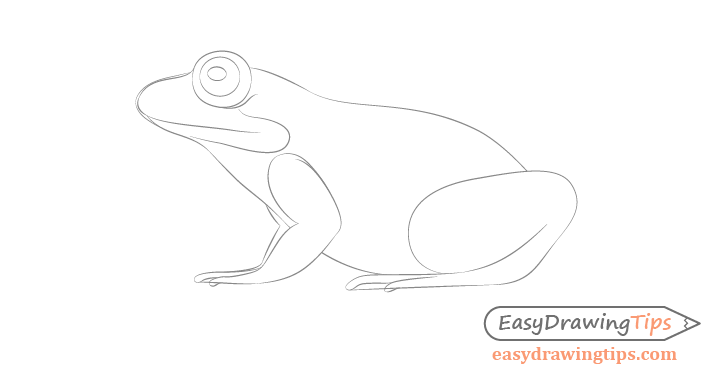
Now draw in the smaller details of the frogs body such as the eye, mouth and toes. Also give some hint's of the folds of it's skin around the front legs and curves around the eyes and mouth.
The eye of the frog will be pretty much round with an oval shaped pupil.
The mouth will go slightly past the eye area with the outer mouth shape located some close to the top of the front legs.
Only two of the toes on each foot will be visible in this view. one thing to note is that the toes on the right leg will be significantly longer than the toes on the left going almost to the elbow on the front legs.
Step 7 – Make a Clean Solid Line Drawing
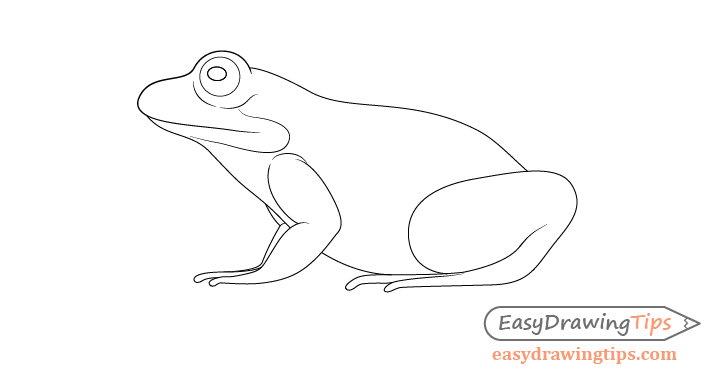
Once again clean up your drawing and afterwards go over your lighter line with a more solid stroke.
Step 8 – Add More Details
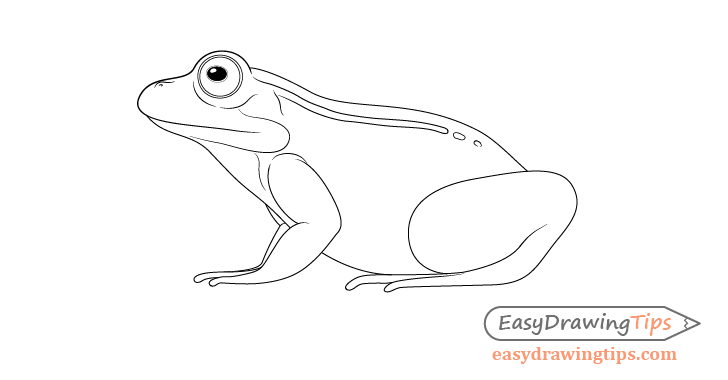
Add some more of the details of the frog such as the nose, a few more folds of the body and the "vein" shape along the back. These types of frogs have two of these (one along each side of the body) but only one will be visible in this view.
If needed you can also first make a light line drawing of each of the above and go over them with darker line afterwards.
Finally you can also shade the pupil of the eye black but leave a white area for the highlight/reflection area. This will give the eye that "shiny" look.
Step 9 Add the Spots & Finish the Frog Drawing
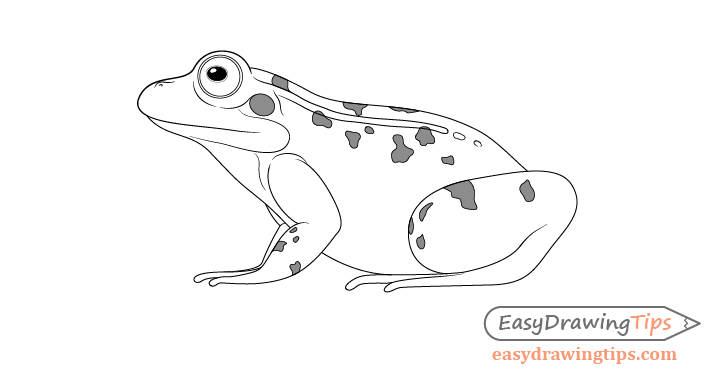
Now for the finishing touches add the spots along the frogs body. You will also notice there is a sort of "round spot" around the back of the eye area. This is something frogs of this type tend to have. It can be dark or the same color as the rest of the frog.
For the rest of the spots try and place them somewhat randomly and vary them in size and shape to have the spots look natural.
You can also lightly shade the spots after you draw their outer shapes.
Once finished you should have a nice line drawing of a frog.
Conclusion
This is a fairly simple and detailed tutorial that's good for beginners as a frog is a fairly easy animal to draw. For drawing other types of animals also check out:
- How to Draw a Dolphin Step by Step
- How to Draw a Rabbit Step by Step Tutorial
- How to Draw a Squirrel From the Side View Tutorial
- How to Draw a Lion Full Body Step by Step
Source: https://www.easydrawingtips.com/how-to-draw-a-frog-step-by-step-tutorial/
0 Response to "How to Draw a Cute Tree Frog"
Postar um comentário